


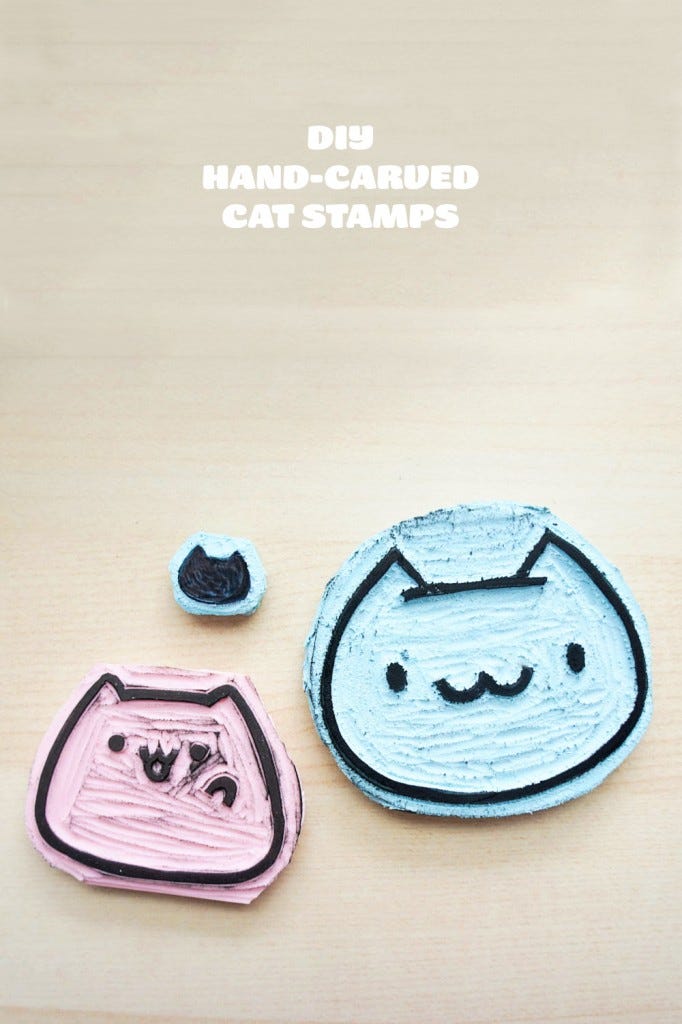
DIY: Hand Carved Cat Stamps
From the Crafty Archive

Hi! I’m Becky and I like making stuff and chatting with creative people. This publication is funded by readers like you and subscribers support this little creative space on the internet ♡
Many moons ago, I was a DIY blogger and would occasionally have partnerships with brands. Most of my work was centered around cats and this craft was actually sponsored by the Fancy Feast blog! I’m pretty sure I got paid in cat treats? I swear, I felt like I’d made it.
I’ve decided to bring back some of my favorite DIYs from my blogging days and I thought this was the perfect project to share!

SUPPLIES
Find everything in one spot by using: ShopMy Affiliate Links
Cat face template – download here
Carving block (the blue one I used was a little crumblier than I like, but things might have changed since I first posted this!)
Carving tools ( this is a less expensive alternative that works just as well for this project)
Pencil
Sharpie
Optional: Stamp pad or block printing ink with roller


DIRECTIONS
First, you want to transfer the design onto the block. Start by taking your pencil and tracing on top of the black line of the design.
Flip the design over and use the handle of your carving tool to rub over the design. Be sure to hold it in place so it doesn’t scoot around. When you take it off, you’ll see the pencil has rubbed off on the block. Magic!
After that, I like to trace over my pencil rubbing with a sharpie, just so I don’t get lead on my hands while carving. If you’re using a colored ink to stamp with in the end, be sure to take off any excess Sharpie ink before stamping. I learned that the hard way when stamping our wedding invites a few years ago. Womp womp.
Then, get to carving! I like to make my initial cuts around lines so the whole design is outlined, then go back in and carve the bulk of it out.
Cut your stamp out with regular craft scissors and you’re done! (If you’re feeling sassy, you can glue the stamp to a wooden block and look like a pro.)


Easy peasy! You can use this to stamp cards, make wrapping paper patterns, stamp a shirt or tea towel (with fabric ink), make your mark on the cover of a notebook, anything at all really. By the way, here’s a little behind the scenes action with Sprinkles. She was sitting in the window the whole time I was making this. Sweet girl!
If you make anything with this tutorial, I’d love to see! You can comment here or tag me over on Instagram (@thebeckyhelms) so I take a peek and cheer you on 🎉
♡ Becky
These patterns are for personal use only and cannot be sold or altered in any way. Thank you!